Creating a Product Pt.1
Whilst in previous sections we have covered a few select points of the Shopify admin and back end settings, in this particularly guide I will aim to cover product creation in-depth, as there are many things that can be easily overlooked which can result in things such as incorrect pricing or poor discoverability of your product.
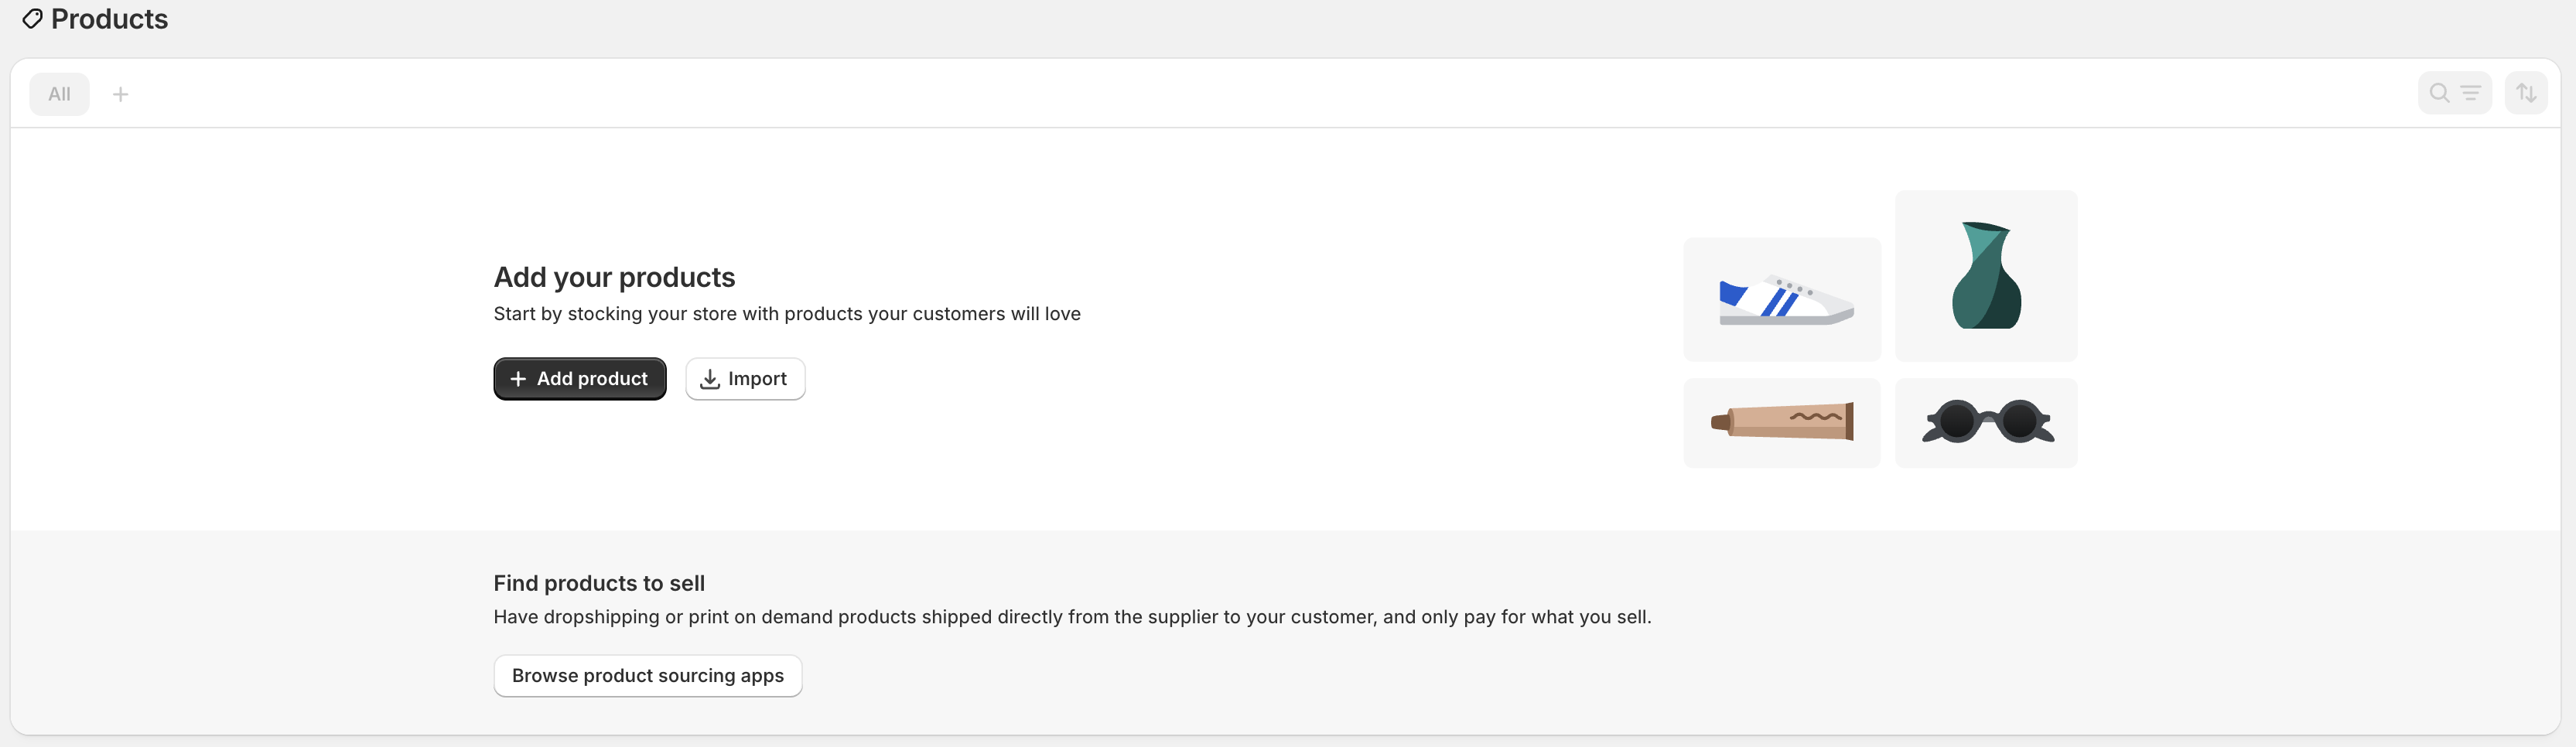
If you click the ‘Products’ tab from the admin menu, you will be presented with a screen similar to the one pictured below (if you’ve already created a product, it will appear here). Since this is the first product being created for the store, I’ll go ahead and click the ‘Add Product’ button.
Once you click “Add Product,” you’ll be taken to the product editor—similar to the one pictured above. (Depending on your screen size, some elements may appear slightly off-screen.) To make things easier to follow, I’ve broken down this first part of the product editor into three sections.
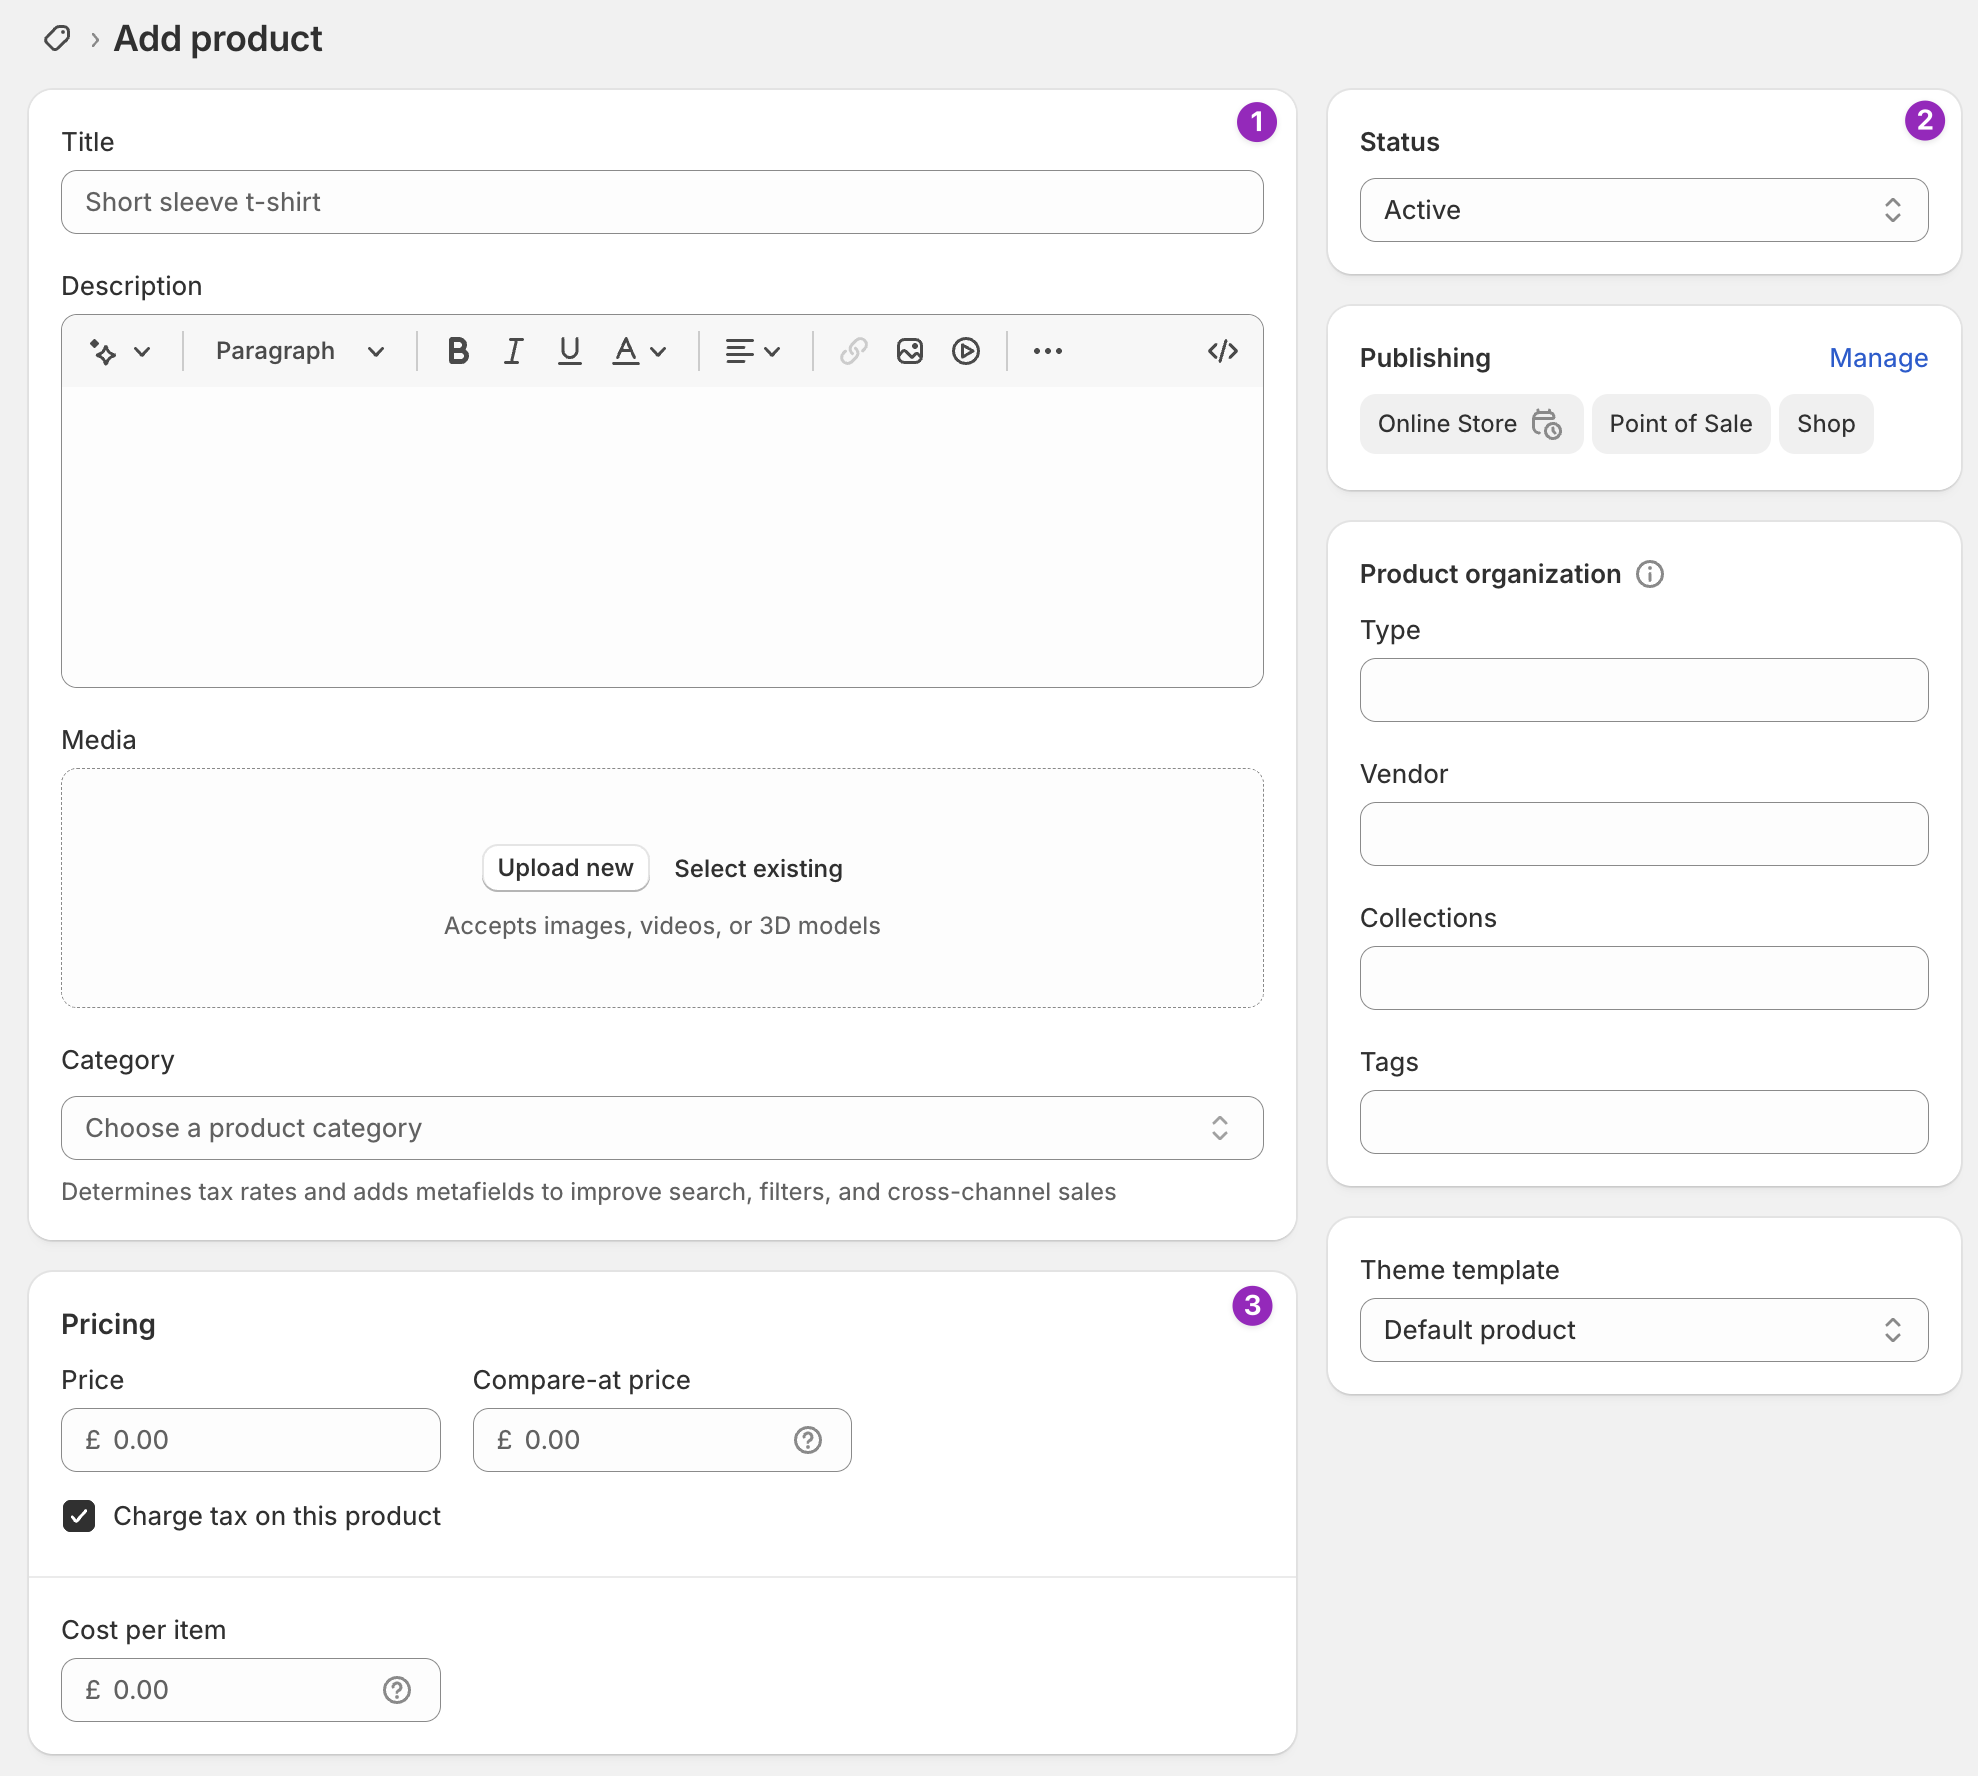
1. Name, Description & Imagery
Section titled “1. Name, Description & Imagery”The product name and description are the core pieces of information your customers will rely on to find your product and understand what it offers. You can use the Rich Text Editor in the description area to format your text—adding headings, lists, links, and more to make your copy more engaging.
In the Media section, you can upload images or videos to visually showcase your product. Having good quality, consistent product imagery goes a long way in to drawing in customers and making them more likely to purchase.
As for the Product Category (not to be confused with Collections, which I’ll cover shortly), choose the option that best matches your item. Shopify uses this to recommend relevant metafields that you can use later for added customization. Don’t worry if you can’t find a perfect match—just select the closest relevant category.
2. Product Status and Organisation
Section titled “2. Product Status and Organisation”Product status indicates whether or not your product is live on your store. I recommend setting this to ‘Draft’ in the majority of cases, until you’re entirely happy the product is ready to go live. Making changes to a live product is not recommended as this could lead to confusion if you have users active on site.
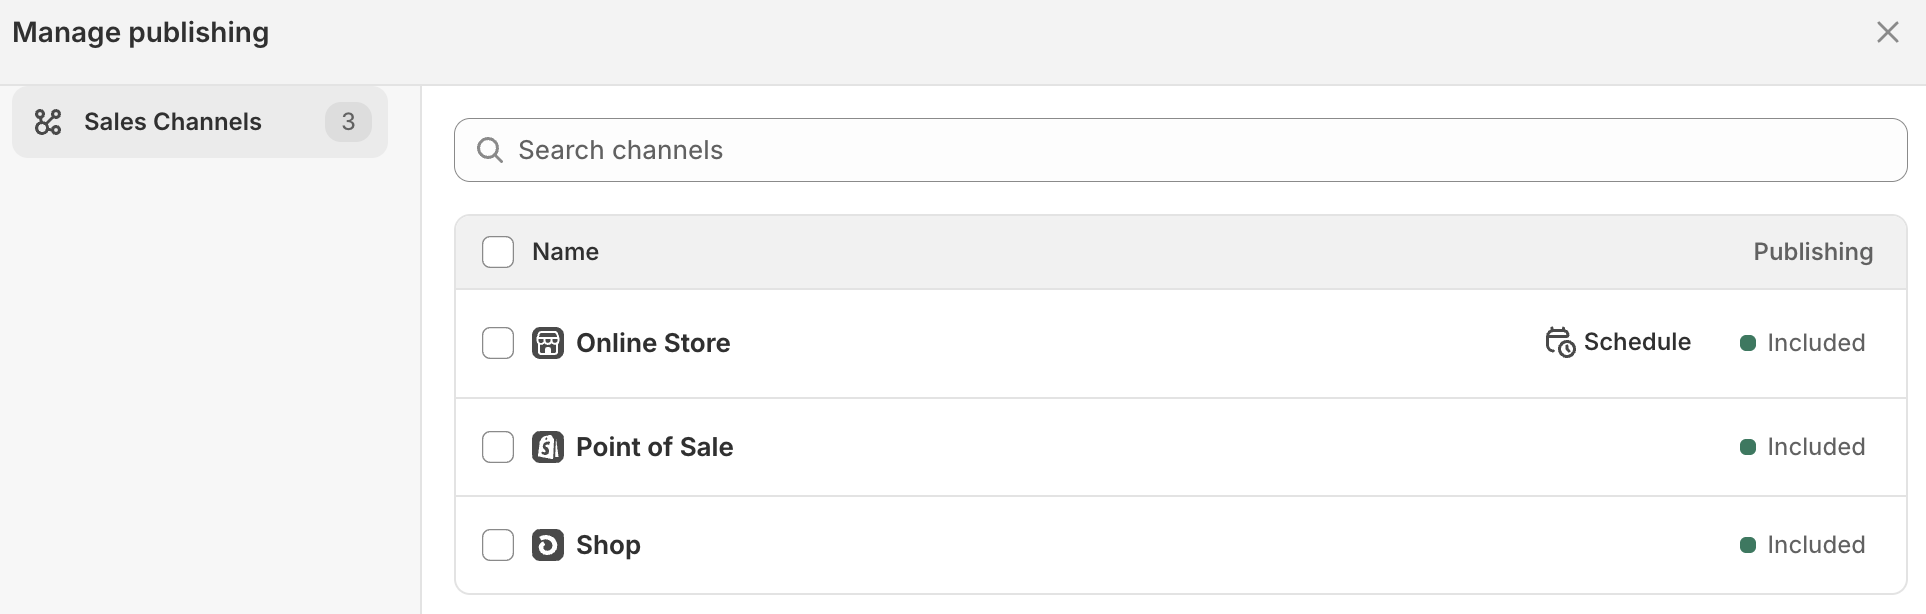
Publishing relates to the Sales Channels you want your product to be available on. ‘Online Store’ aka the front end of your shop, will be the first option to be enabled by default and you can enable additional sales channels accordingly.
The Product Organisation section is a key part of how your products will be organised throughout your site.
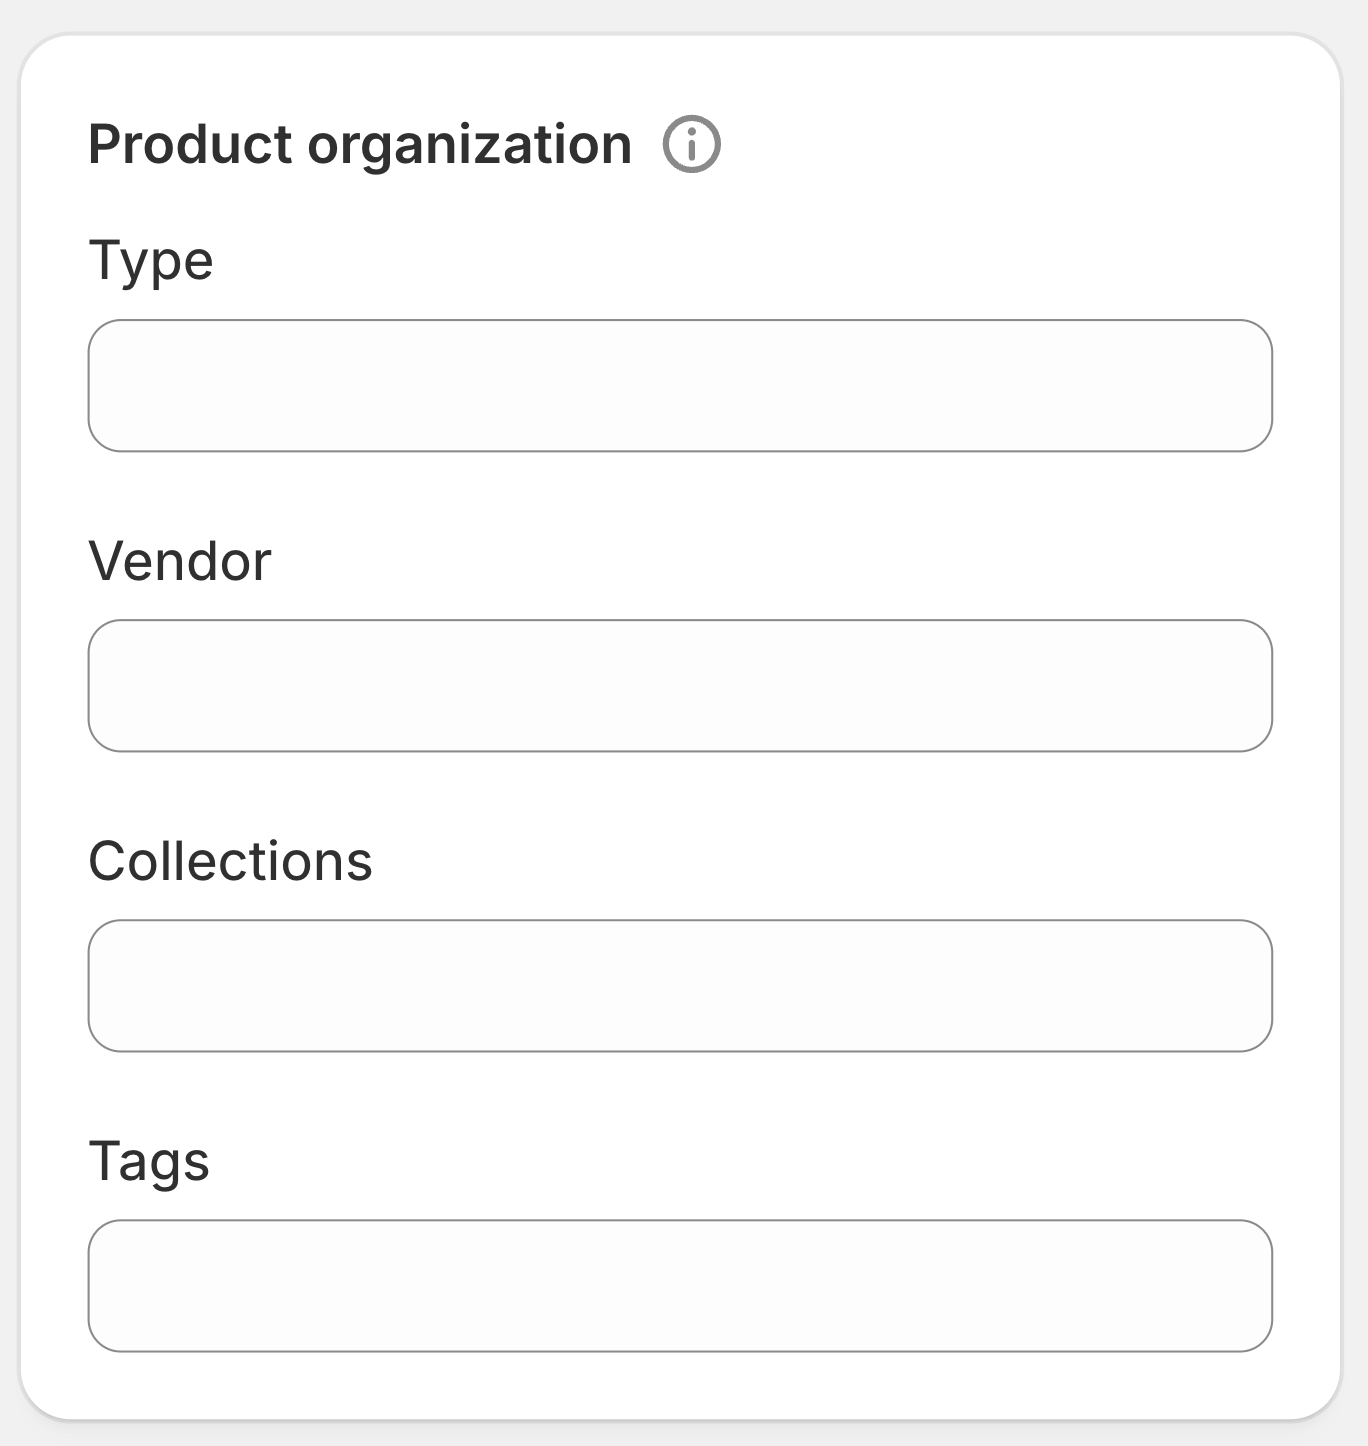
Type
Think of this as the category or kind of product you’re selling – like “T-shirt,” “Jacket,” or “Sneakers.” It’s a simple way to group similar items, and it comes in handy when you want to create custom categories or filters later on. If Shopify’s default categories don’t quite fit your setup, this gives you the flexibility to make your own.
Vendor
If you stock products from different brands, adding the vendor name to each product is advised. It helps down the line when you are conducting sales analysis to see your strongest performers for example, as you can filter by Vendor without needing to classify products once more.
Collections
Collections are like the aisles or sections in a bricks and mortar shop. You might have a “Fall/Winter” section for seasonal items, a “Footwear” wall for all your shoes, or a “Outlet” area. Collections help you display products together in a way that makes sense for your customers. In addition, a product can be in more than one collection. A flannel shirt from your Fall collection? It can live in both “Fall/Winter” and “Shirts.” More ways for people to find what they’re looking for and more options for you to promote on the front end of your store.
Tags
These are little keywords you attach to your products to help with sorting, searching, and filtering – both for you and your customers.
You might use tags like cotton, navy, jacket, or outerwear to describe features, styles, or overarching categories. These aren’t visible on the storefront by default, but they work behind the scenes to help you create and organise your collections.
Tags are a powerful tool that allow you to use ‘Smart Collections’ which automatically add products to a collection based off of their tag or set of conditions. For example, if you want to create a collection that includes all Jackets in your catalogue, you can simply set your parameters to include all products tagged with Jacket and your collection will be created accordingly.
3. Pricing Information
Section titled “3. Pricing Information”The third section we’re concerned with here is pricing. This is one of several ways you can input pricing for your products.
Price
This is the main price of your product – the one your customers will see and pay at checkout. Think of it as your regular selling price or RRP (Recommended Retail Price).
Compare-at Price
Use this if you want to show a discount. It’s where you put the original price of the product before the markdown. For example, if a shirt used to be £99 but you’re now selling it for £89, you’d enter £99 in the Compare-at Price field, and £89 in the Price field.
On your storefront, Shopify will show both – the original price crossed out, and the new lower price highlighted – making it clear there’s a deal.
Cost Per Item
This is what the product actually costs you – sometimes known as the landed cost. It includes everything from the supplier price to shipping, customs, and any other fees involved in getting the product to you.
Customers won’t see this number, but it’s useful behind the scenes. Adding it allows Shopify to calculate your profit margins and gives you more accurate reports on how your business is doing.
Take a breath, that might seem like a lot to take in and it’s only the first part of the show! Grab a coffee, walk the dog, then let’s jump in to Part 2 of the product creation process.